Registering an Entra App for Service-to-Service Authentication
This guide explains how to register an application in Microsoft Entra ID for Service-to-Service (S2S) authentication to Dynamics 365 Business Central, configure the required permissions, and generate a client secret.
Official documentation
You can find the official Microsoft procedure here: Using Service to Service Authentication – Business Central | Microsoft Learn
What you will need
- Access to portal.azure.com with permission to register applications.
- The Administrator role to grant consent for permissions (step 11).
Register a new application
1. Open Microsoft Entra ID
On portal.azure.com, search for Entra and open Microsoft Entra ID.

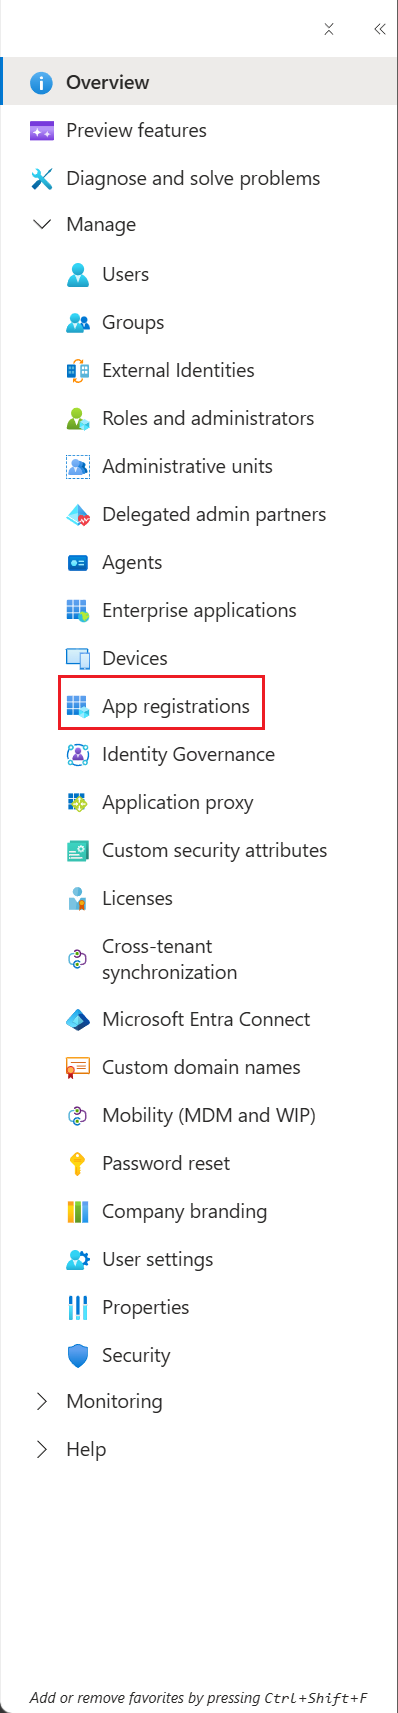
2. Go to App registrations
In the left panel, select App registrations.
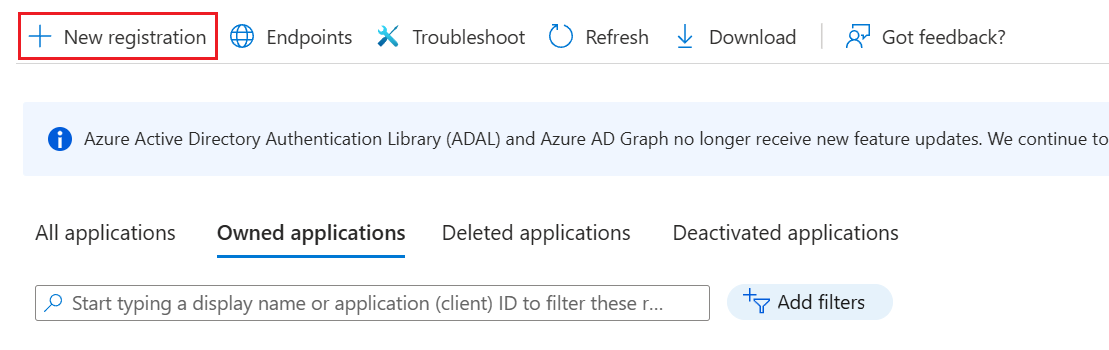
3. Start a new registration
In the top bar, click New registration.
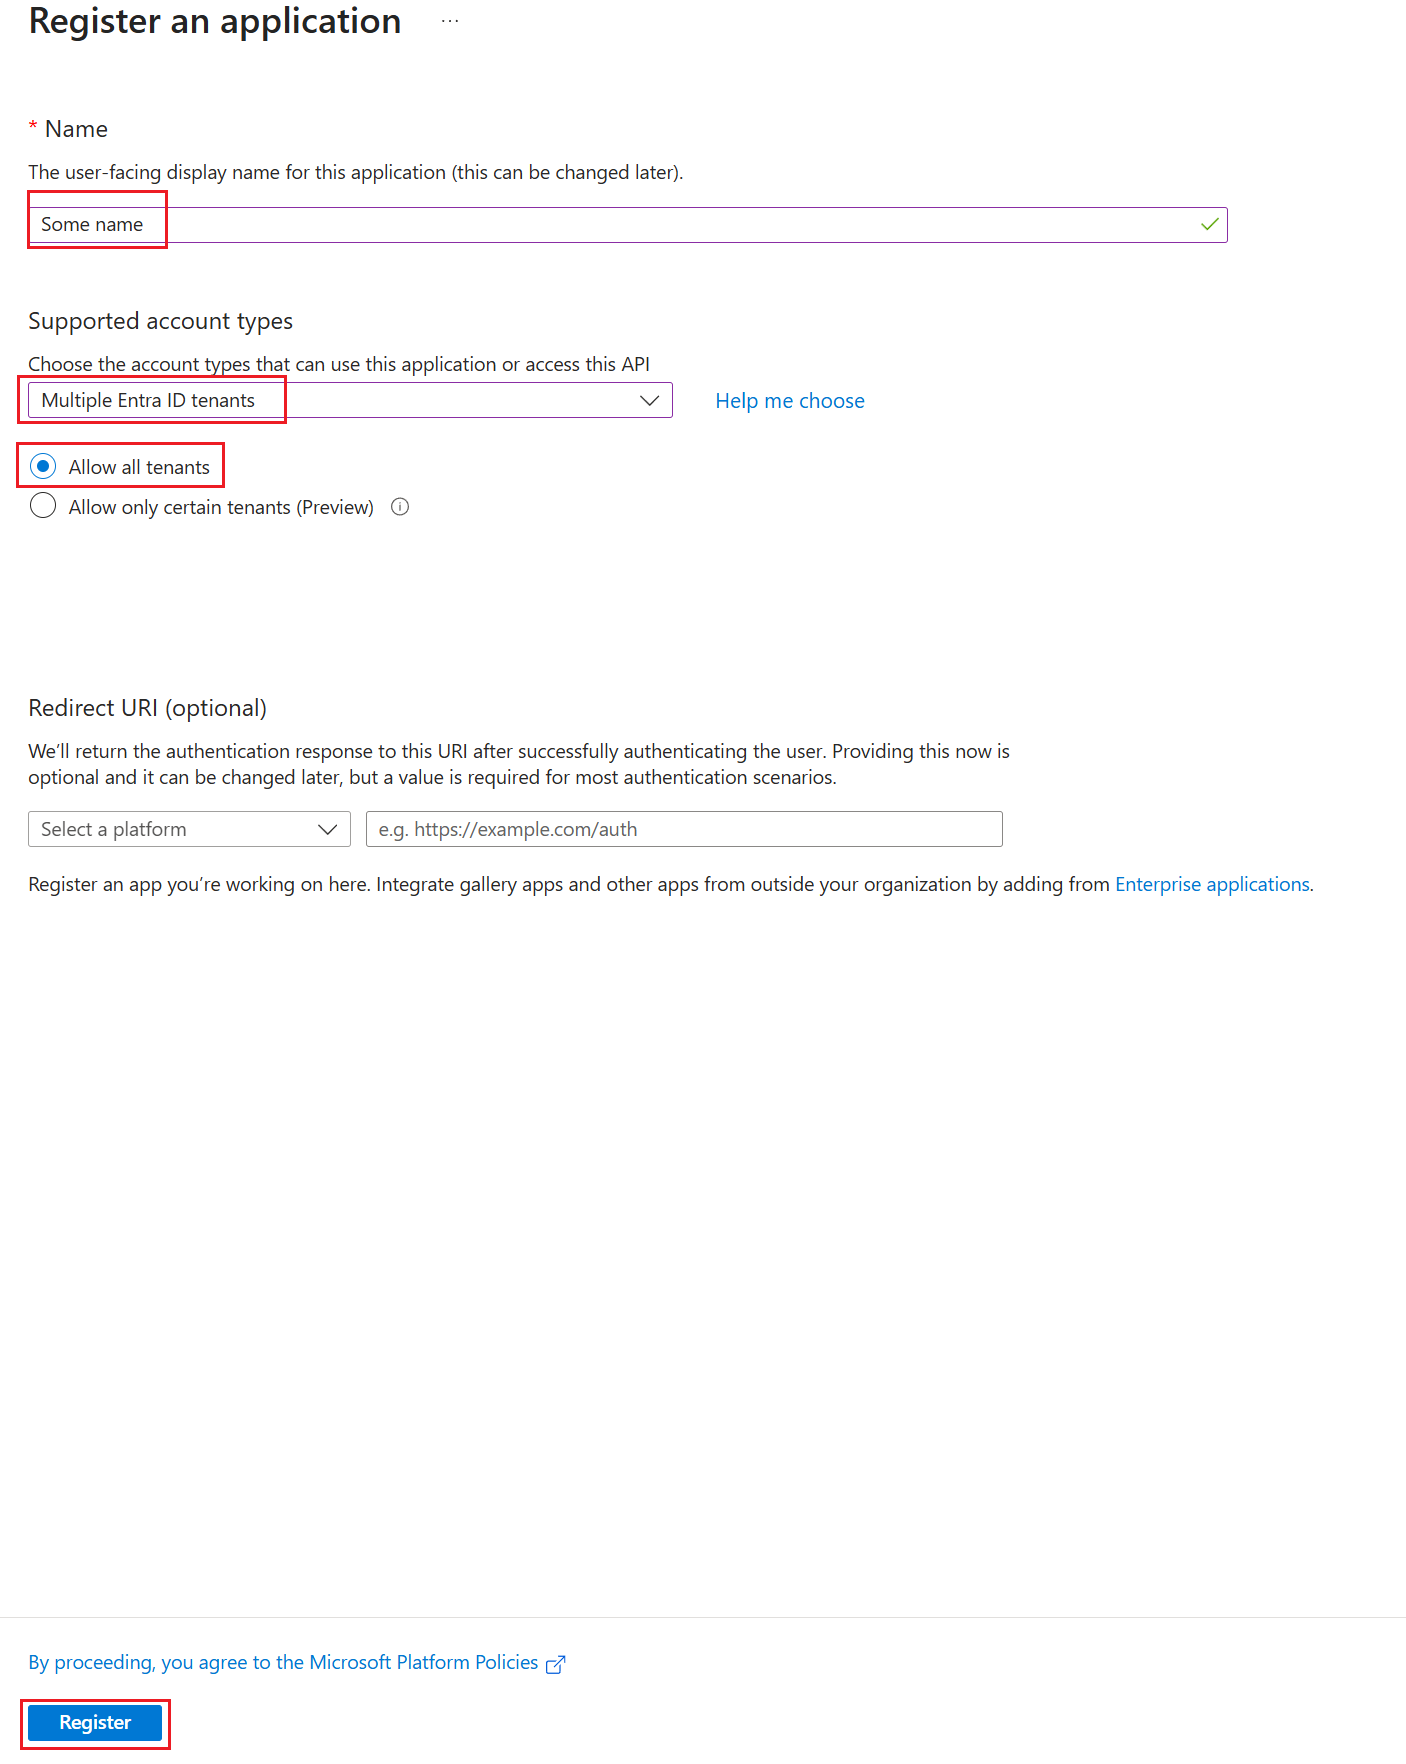
4. Fill in the application details
- Enter the name of the new application.
- Select Accounts in any organizational directory.
- Choose Allow all tenants.
- Confirm by clicking Register.
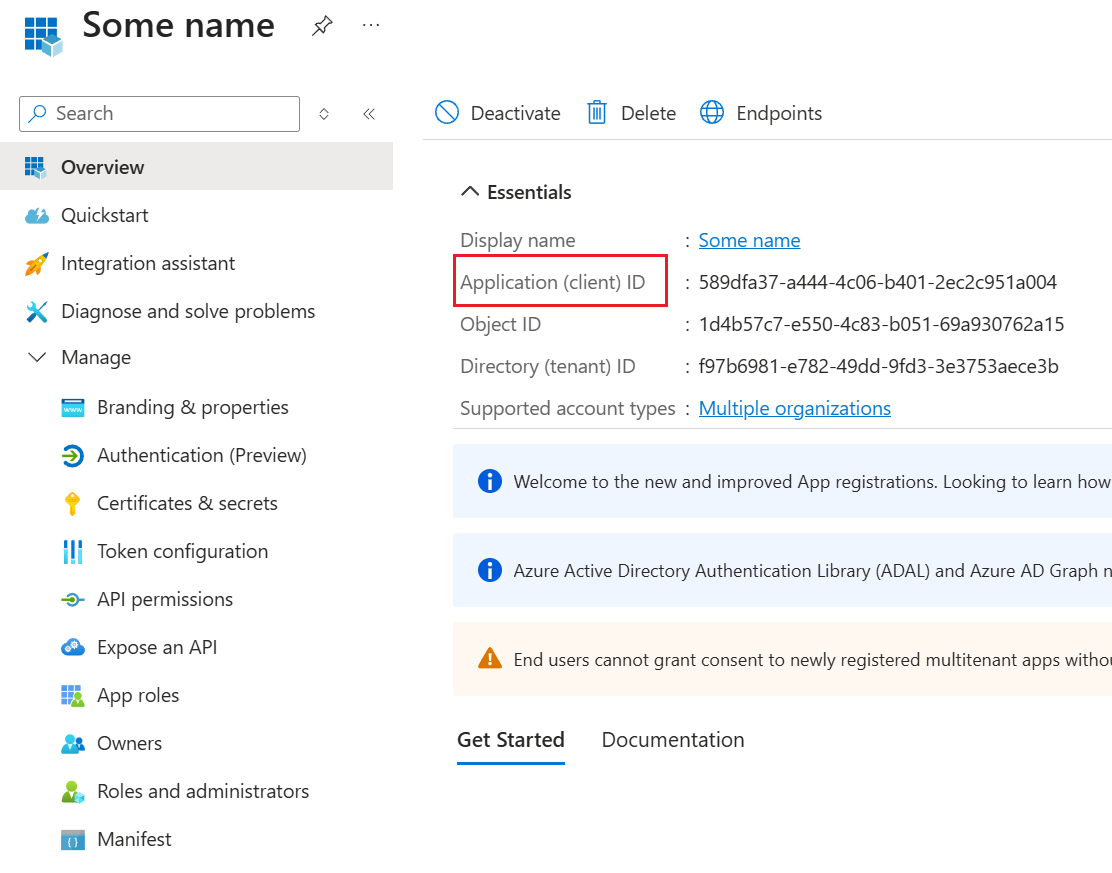
5. Copy the application ID
After registration, the app overview page appears and includes the Application (client) ID.
Configure API permissions
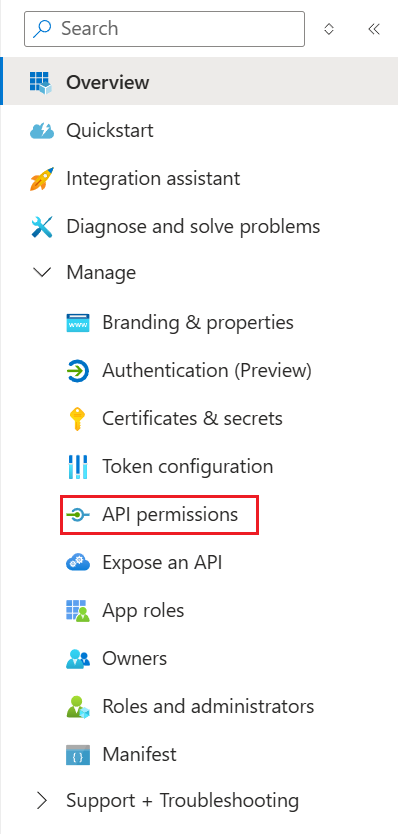
6. Open API permissions
In the left panel, go to API permissions.
7. Add permissions
Click Add a permission.

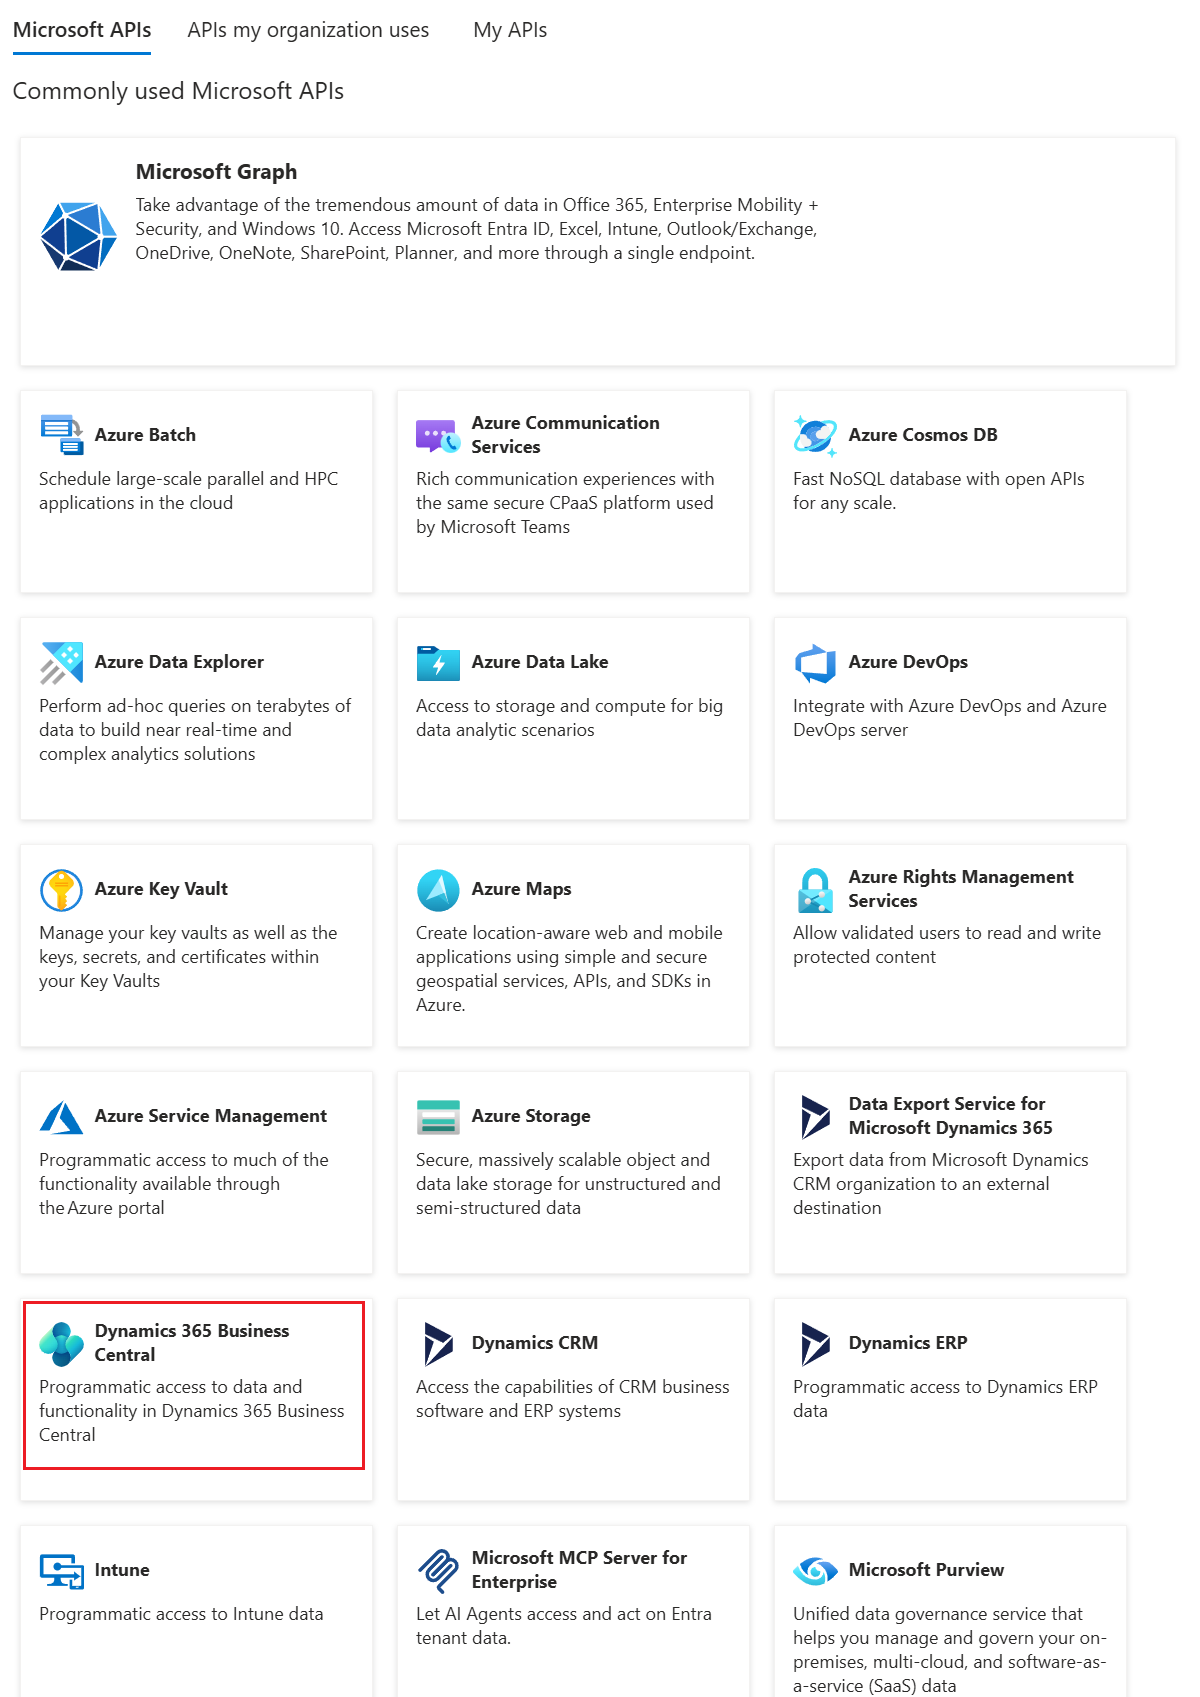
8. Select Dynamics 365 Business Central
Find and select Dynamics 365 Business Central.
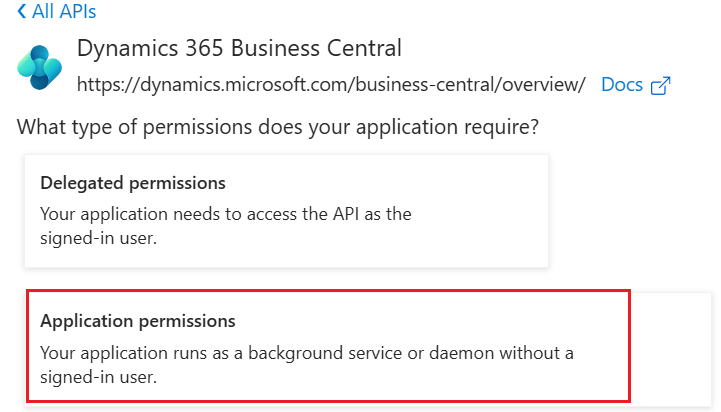
9. Choose application permissions
Select Application permissions.
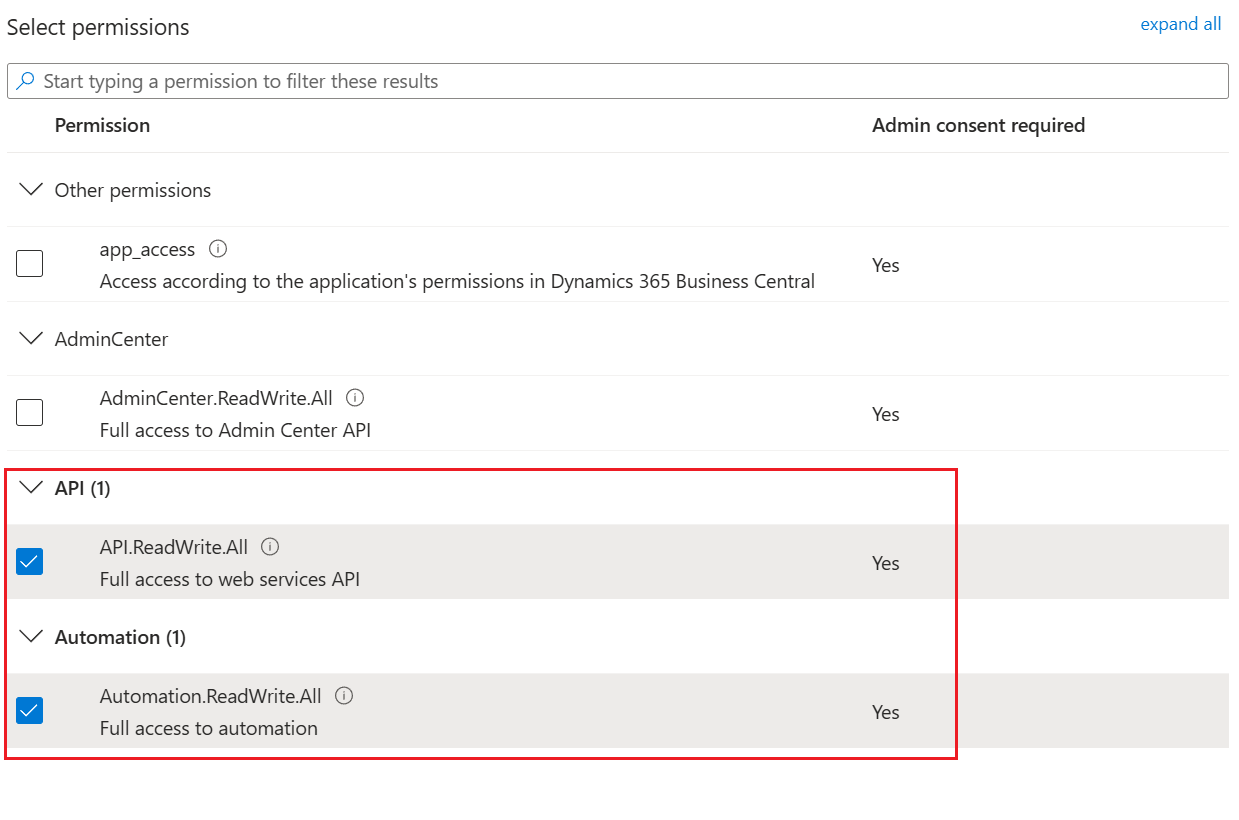
10. Grant the API and Automation permissions
- Grant the app the API and Automation permissions.
- Confirm by clicking Add permissions.
11. Grant admin consent
After adding the permissions, click Grant admin consent for xxx.
Requires administrator role
This step can be done only by a user with the Administrator role. Without admin consent, the permissions will not become active.

12. Confirm consent
In the dialog, confirm by pressing Yes.

Create a client secret
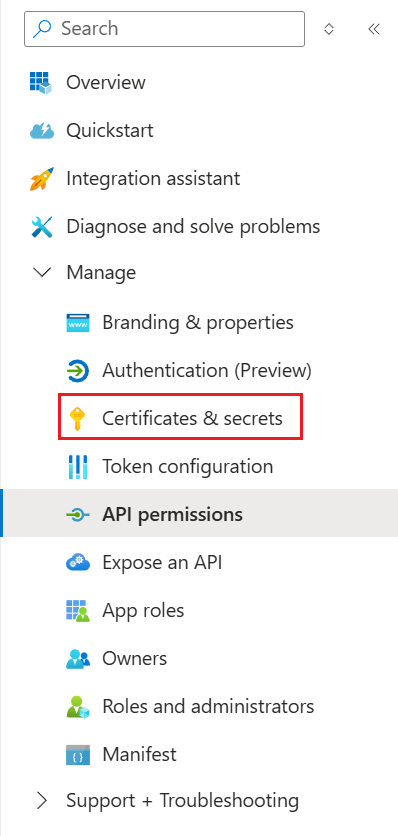
13. Open Certificates & secrets
In the left panel, choose Certificates & secrets.
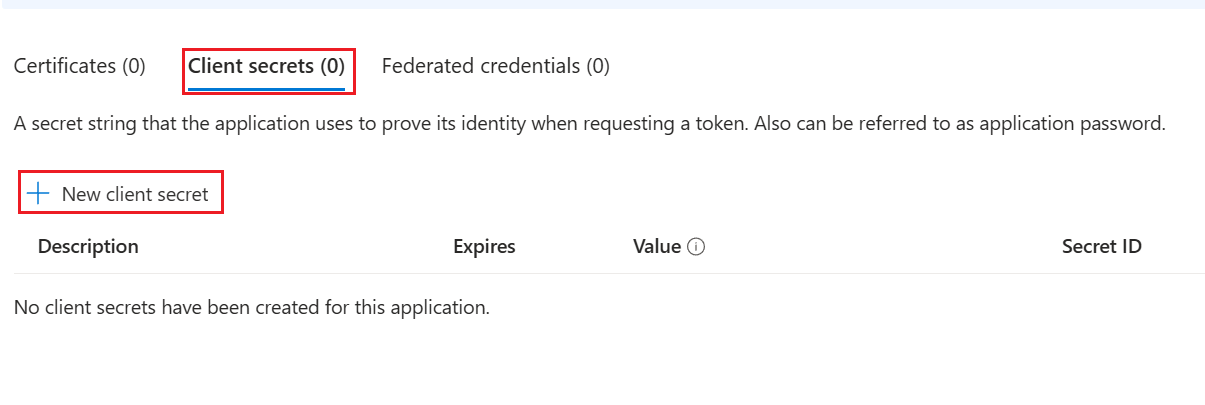
14. Create a new client secret
On the Client secrets tab, click + New client secret.
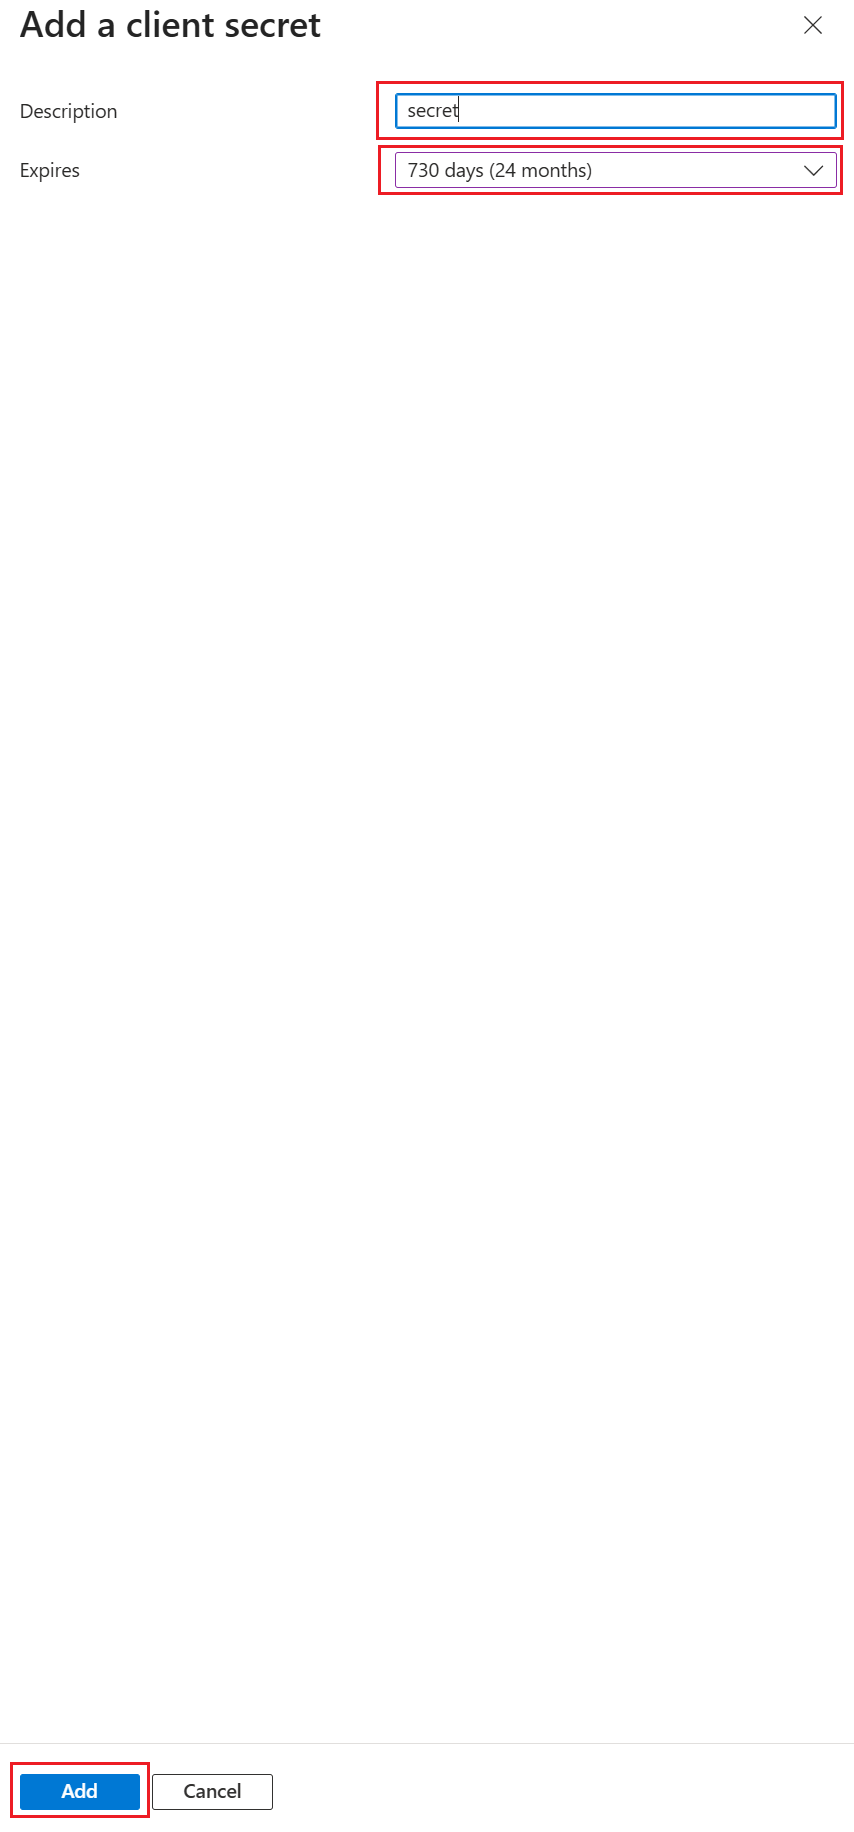
15. Name it and set expiration
- Give the secret a name and set its expiration (recommended max. 12–24 months).
- Confirm by clicking Add.
16. Copy the secret value
Copy the value immediately
The secret value is visible only immediately after creation. After leaving the page, it can no longer be displayed, and you would need to create a new secret.

Done
The application is registered and ready for Service-to-Service authentication. To complete the setup, please send us the Application (client) ID and the client secret value.
Managing and renewing the secret
Client secrets have a limited lifespan and must be renewed before expiration. For a detailed procedure for updating the client secret (including recommendations for recording and responsibility), see the guide Updating a Secret in Microsoft Entra ID.